Let’s start with a truth: my mom, Stasia, was an amazing cook. Born in Poland, she carried with her a culinary wisdom that made her pierogi, without a doubt, the best. Now, I know everyone says that about their mom’s cooking, but with Stasia, it was for real. Anyone who was lucky enough to try them was completely blown away by that light, pillowy dough that just melted in your mouth, and the perfect, cheesy filling.

She didn’t stop there. She also made delicious berry ones, and her kitchen was a place of endless creativity, with fillings like cottage cheese and even sauerkraut and mushrooms. But she never wanted to sell them—first of all, it was way too much work! But more importantly, it was her special touch that made them amazing, a touch that she perfected over 30 years.

my mom in the kitchen.
And that secret to her amazing dough? After all her experimenting, she told me it was simply warm milk. That’s it! While some may use sour cream or other ingredients, for her, that was the magic. So, as you make this recipe, I hope you try and enjoy a piece of our family’s tradition, and maybe, just maybe, you’ll find that special touch too.

Thanks, Mama!
you can politely say, “No thank you, I’ll have a whole plate of pierogi.” LOL!
The History of a Beloved Dumpling
The origins of the pierogi are a subject of friendly debate, but one thing is certain: they hold a special place in the hearts of many Eastern and Central European cultures. While scholars believe the concept of a stuffed dumpling likely originated in Asia and traveled to Europe via the Silk Road, Poland has truly made the pierogi its own.
One popular legend credits the 13th-century Dominican friar, Saint Hyacinth, with bringing the dish to Poland from what was then the Kievan Rus’ (modern-day Ukraine). He is said to have fed the people pierogi during a time of famine, earning him the affectionate title of “Patron Saint of Pierogi.”
Over time, pierogi evolved from a simple peasant food to a cherished dish enjoyed by all social classes. They became a staple for holidays and special occasions, with different fillings and shapes for events like Christmas, weddings, and funerals.
What’s in a Name?
Understanding the name of this dumpling can be a bit tricky, especially when talking about it in different languages.
- In Polish, “pierogi” is already the plural form. If you’re talking about a single dumpling, you would use the singular form: pieróg.
- In Ukrainian, the most common name is varenyky (вареники). The word comes from varyty, meaning “to boil.” The singular form is varenyk (вареник). The term “pyrohy” (пироги) is also used in some regions.
with closing the pieróg seam – which I like to call
the ‘pierogi pinch’!
THE RECIPE! The Pierogi Dough (Video down below)
(This will yield a few dozen pierogi, depending on how large you cut your dough circles)
Ingredients:
- 4 cups all-purpose flour (and more as needed)
- 1 large egg
- 1 tsp salt
- 1 ½ cups hot water
- ½ cup warmed milk
- 2 tablespoons melted butter
Instructions:
- Mix the Dough: In a large bowl, combine the flour, egg, hot water, warmed milk, and melted butter. Mix with a dough wisk, spoon or by hand until the dough comes together. It will be VERY sticky at this point that’s why we add flour now by hand. Sprinkle flour into the bowl little by little and mix each time. If it’s still really gloppy add more flour just don’t over do it! Once you can gather it into somewhat of a dough ball – turn it out onto a lightly floured flat surface. The dough should STILL be sticky – that’s ok! We don’t want to add so much flour to the bowl that it’s tough. It should be a soft sticky-ish dough ball. We’re now going to KNEAD IN more flour little by little until it’s perfect!

- Knead: Now that you’ve turned the dough out onto a lightly floured surface, put a little pile of flour near the dough and keep sweeping a little from the pile toward the dough and knead into it until it’s no longer sticky. Knead by hand for about 6 minutes, incorporating just enough flour until you have a nice smooth elastic dough. Be careful not to use too much flour, as it will make the dough tough!!
- Rest: Place the kneaded dough in a lightly floured bowl, cover it with a cloth or plastic wrap, and let it rest for 30 minutes.
Assembly & Cooking
- Prepare the Dough: Dust a flat surface with flour. Cut the dough ball in half, leaving the other half in the covered bowl to prevent it from drying out.
- Roll and Cut: With a rolling pin, roll out the dough until it’s as thin as a slice of wrapped processed cheese (how’s that for a handy visual lol)

the thickness of a slice of processed cheese.
- Use a round cookie cutter or a glass to cut your dough circles.
- Fill & Seal: Take a dough circle and stretch it gently. Place a heaping tablespoon of your chosen filling in the center. Pinch the ends together firmly to create a seal, being careful not to catch any filling in the seam, as it will open when cooking. Dip your finger in a little flour to help with the pinch! Try some different fun designs if you like.
- Boil: Place the filled pierogi on a lightly floured tea towel on a tray. When you’re ready to cook, bring a pot of water to a gentle boil (not too rapid). Let the pierogi float to the top; they should be cooked in about 2-3 minutes.
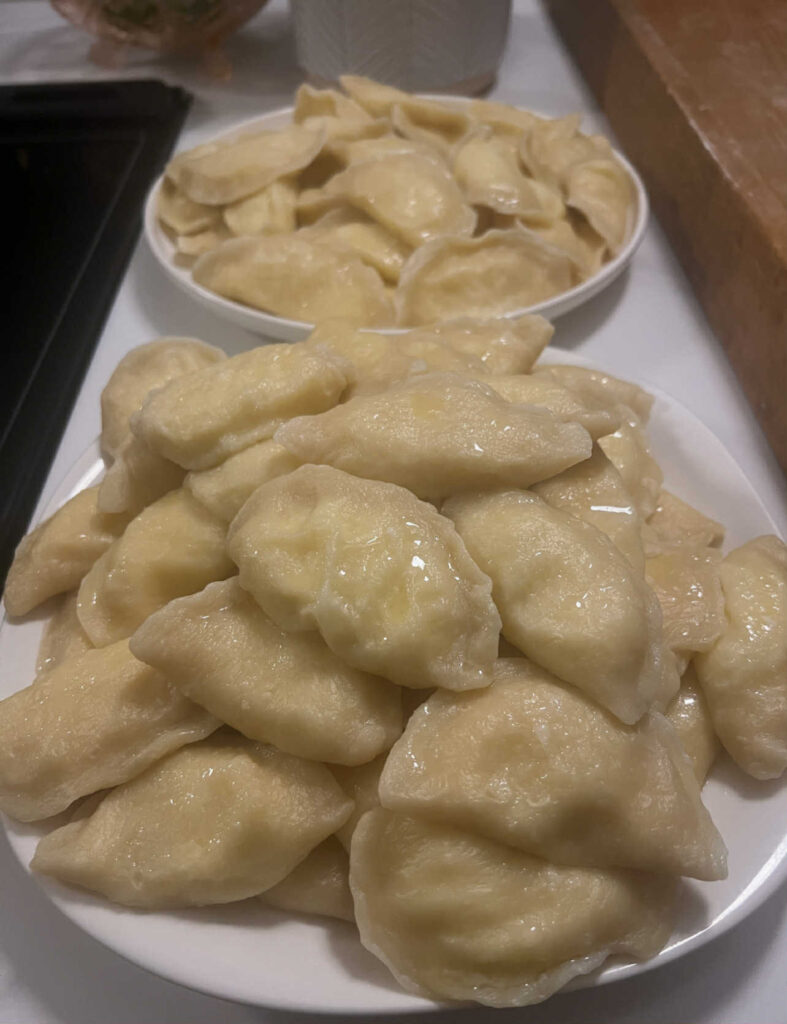
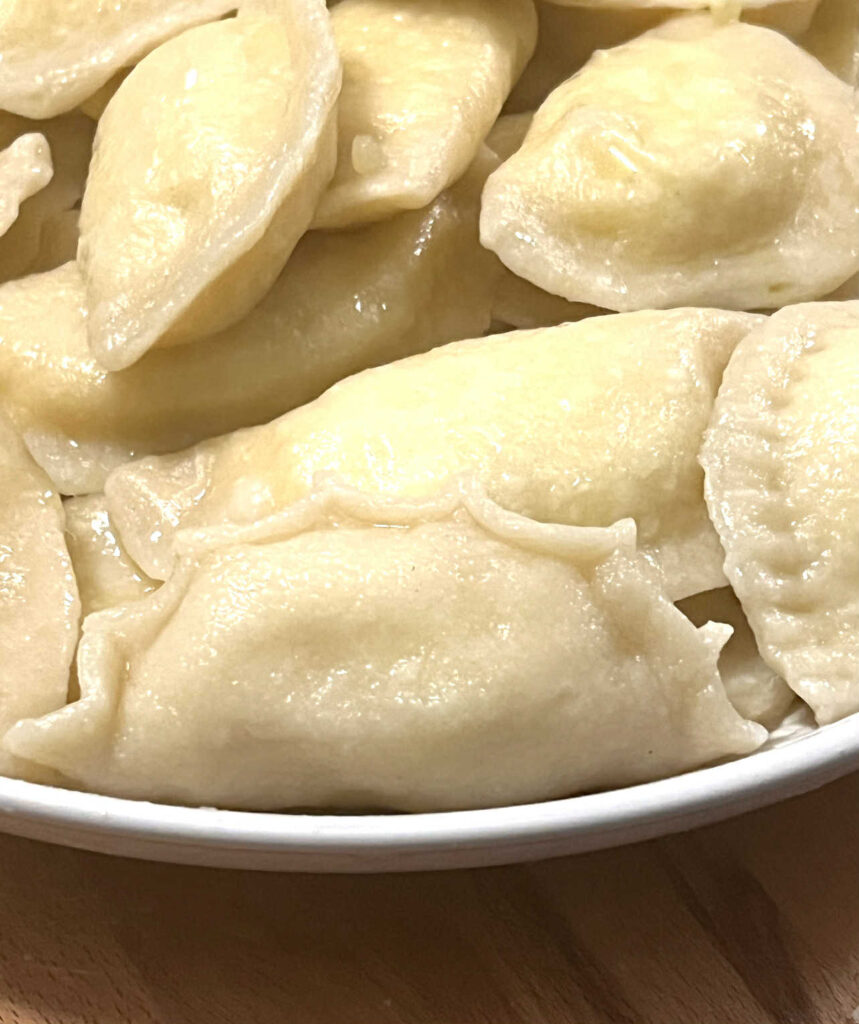
- Finish: Remove the pierogi from the water with a spider strainer or slotted spoon. Place them on a plate that has some melted butter on it, then add a little melted butter on top to keep them from sticking. When you go to fry them, you won’t need to add a lot more butter to the pan.
Filling Recipes
1. Classic Cheese & Potato:
- Ingredients:
- 10 pounds Yukon Gold (preferably) or any potato labeled as “yellow” or “gold” will work well. They generally have a similar buttery flavor and all-purpose texture.
- 2 large blocks (600-800 grams) shredded fort or extra-fort white cheddar cheese (or fort orange cheddar). These give the potatoes a lot more flavour. FYI: (If you use Velveeta – (just don’t tell me) – that’s like eating pierogi with ketchup (don’t tell me that either lol)
- 1/4 cup of melted butter, salt, and pepper to taste
- Instructions:
- Boil potatoes with their skins on until they’re tender. This helps prevent them from becoming “wet” or waterlogged. Once they’re cooked, carefully peel the hot potatoes and mash them, or use a potato ricer for a smoother result.
- Tip: Using a ricer is a great way to get a lump-free texture without overworking the potatoes, which can make them gummy.
- Add the shredded cheese, melted butter, salt, and pepper. Mix until well combined.
- Pro-Tips: You can reduce the cheese and add a little cream cheese for extra creaminess. For more flavor, add in fresh dill, fried onions, or even some finely chopped jalapeños!
2. Sweet Fruit Filling:
- Ingredients:
- Fresh Saskatoon berries, blueberries, or fresh plums/peaches
- Sugar, to taste
- Instructions:
- Add a little sugar to your fresh fruit and mix well.
- Pro-Tips: Using fresh fruit is best! Canned or frozen fruit can become too slimy or gloopy when cooked.

Serving Suggestions
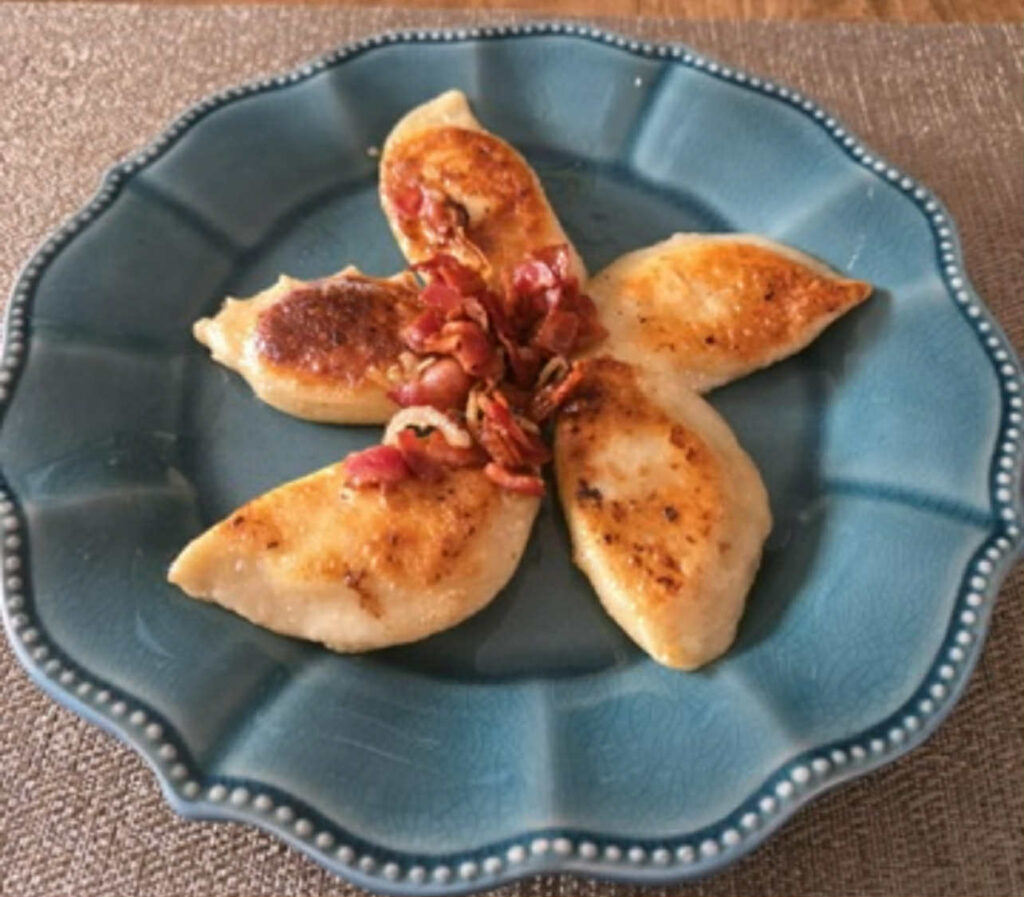
For Savory Pierogi:
- Fry up some fresh bacon and onions with butter.
- You can serve this delicious topping over pierogi that have been freshly boiled, or for a real treat, fry the pierogi up as well until they’re golden brown and crispy! A dollop of sour cream on the side is a must.
For Sweet Berry Pierogi:
- The classic way to serve these is with a little bowl of sour cream that has been mixed with a bit of sugar. It’s the perfect balance of sweet and tangy!
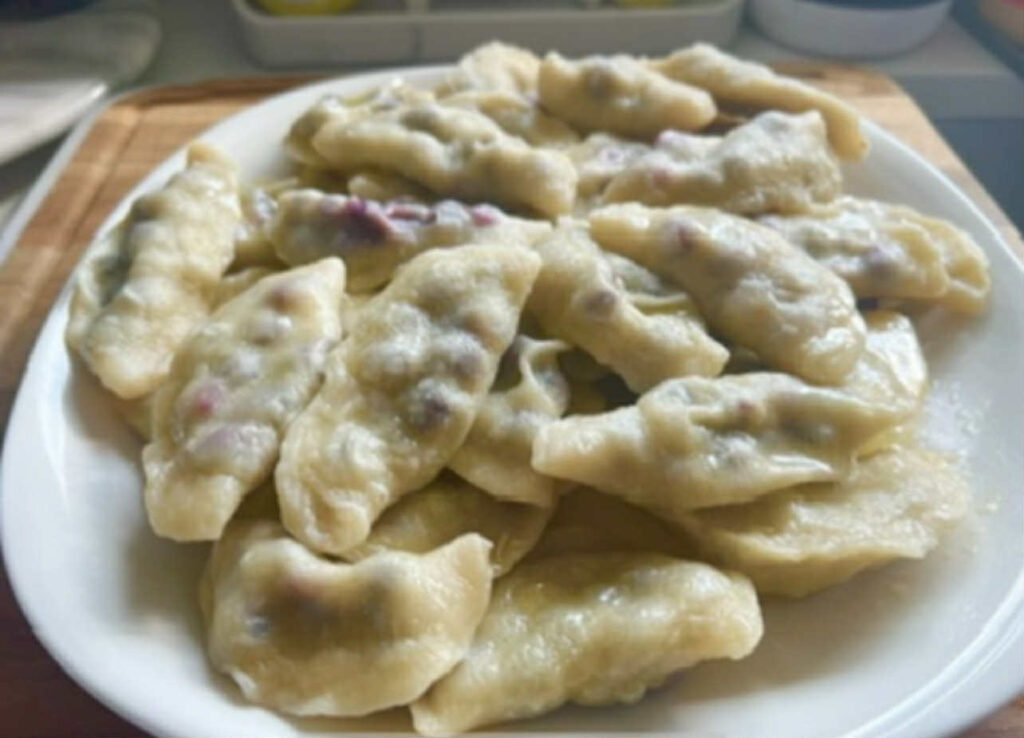
versions like blueberry, strawberry, plum and more!
The most popular fillings are potato, cheese, or a combination of both, but don’t stop there. Get creative with your pierogi fillings, from sauerkraut and cottage cheese to mushrooms and so much more! Have fun pinching! *Smacznego!
*When wishing someone a good meal (like “bon appétit or enjoy”): In Poland they say Smacznego! (pronounced: smahtch-neh-go)
FREEZING PIEROGI
Freezing pierogi is a great way to save time and enjoy them later. The key is to prevent them from sticking together and getting freezer burn. Here’s a step-by-step guide on how to do it effectively:
Method 1: Freezing Raw Pierogi (Most Recommended)
This method is popular because it allows you to cook the pierogi fresh when you’re ready to eat them.
- Prep the pierogi: Once you’ve assembled your pierogi, lay them out in a single layer on a baking sheet lined with parchment paper. Make sure they don’t touch each other. You can also lightly dust them with flour to help prevent sticking.
- Flash freeze: Place the baking sheet in the freezer for about 1-2 hours, or until the pierogi are frozen solid. This “flash freeze” step is crucial because it ensures each pierogi is individually frozen and won’t clump together in the storage bag.
- Store for the long term: Once the pierogi are hard, transfer them to a freezer-safe zip-top bag or airtight container. Squeeze out as much air as possible to prevent freezer burn. Label the bag with the date and the type of filling.
- Cooking from frozen: When you’re ready to eat them, you can drop the frozen pierogi directly into a pot of boiling, salted water. They’ll take a few minutes longer to cook than fresh pierogi. They’re done when they float to the surface and cook for another minute or two. You can then fry them in butter and onions if you’d like.
Method 2: Freezing Blanched or Cooked Pierogi
Some people prefer to blanch or partially cook their pierogi before freezing them. This can reduce cooking time later and helps the pierogi hold their shape.
- Blanch the pierogi: Briefly drop the pierogi into a pot of boiling water for about 30 seconds to a minute. They should be just cooked enough to be firm, but not fully cooked.
- Cool and dry: Remove the pierogi from the water with a slotted spoon and place them on a baking sheet to cool and dry completely. It’s important that they are not wet when you put them in the freezer.
- Flash freeze and store: Follow the same steps as above, laying them on a baking sheet to flash freeze before transferring them to an airtight container or freezer bag.
Note: Pierogi with certain fillings, like cheese, might have a different texture after being frozen. However, potato-based fillings generally hold up very well. For best quality, plan to use your frozen pierogi within 3 months.